How To Paint A St. Patricks Clover Rock Craft Tutorial- Monthly Craft Tutorial and Free Design
March is here, which means spring is near! After being cooped up in the house all winter, I’m feeling that cabin fever. What better way to experience the outdoors than by dropping some painted rocks along your path. I’ve teamed up with Kasey, from Pen and Posh to bring you this lucky clover kindness stone.
In case you didn’t know, the kindness rocks movement was started by Megan Murphy as a way to lend inspiration to others. It started with her writing messages on rocks along the beach, hoping her words of encouragement would bring smiles to others.
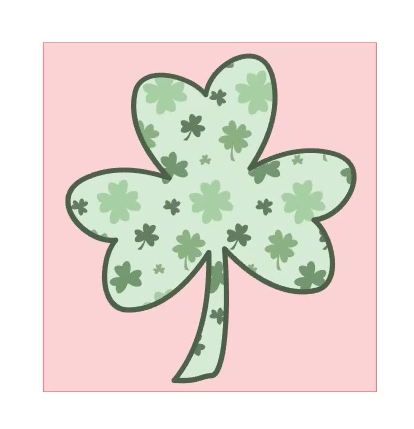
With that in mind, let’s jump into Silhouette Studio and work some magic of our own. I’ll be using Pen and Posh’s free lucky clover filled clover svg file to make a stencil for my rock. This svg file comes with lots of different layers which means you make a few different projects with just one cut file design.
To make the stencil, I need to make all the parts I want to paint be cut away. I start by using my rectangle tool to make the edges of my stencil. I need to be mindful to give myself enough border space around the cutouts so I don’t end up with paint outside of my stencil.

Now, I need to start making my cutouts. Select the light green inner fill color and the dark green outline and hit subtract. This makes the dark green outline, just that, an outline instead of a larger layer.

Next, I’ll go through each of the colored clovers and subtract those from the pink box.

Once those are done, subtract the outline. With all the parts of the stencil selected, click make compound path. This way all the sections of the stencil will be considered one object.


Next, I have to resize the stencil for my rock. After locking the ratio aspect, to keep my stencil proportional, I reduced my size to 2.5 inches tall. Everything is looking good, so it is time to go to the send panel and choose the cut settings.
I’m using Oramask 813 stencil vinyl. I set my machine up with cut settings for Oracal 651. I ended up using a blade depth of 2 and did 2 passes.

Finally, time for the fun part. I did a base coat of acrylic paint over the entire rock. I mixed “holiday green” and white acrylic paint to get a minty color. I put on 2 coats of paint and used my heat gun to get it to dry quickly. To seal in the paint I did 2 coats of Mod Podge Matte. I was finding the stickiness of the stencil was peeling off my base paint so the Mod Podge helped prevent this from happening. Again, I hit it with the heat gun to dry, mostly because I’m too impatient to watch paint dry.
Once that is good and dry, the stencil is placed on the rock. Starting in the center and working out to the edges, trying to avoid bubbling around the cut edges. Carefully peel off the transfer tape and smooth out the stencil.

I’m using a sponge brush to add paint over the stencil. The first coat I put on just to cover all the openings. The second coat I apply generously and push into all the nooks and crannies of the stencil.

Pro Tip: For a crisp clean look, peel the stencil while the paint is still wet. Acrylic paint will stretch and peel when it is dry.
Once all the paint is dry apply 2 coats of Mod Podge to seal the rock. Once that is dry it is time to find a good place to leave the rock for others to find. I left mine leaning on a tree near my local grocery store. If you want to know who ends up with your rock, be sure to leave a hashtag or your social media handle on the back. I wrote mine in sharpie marker and sealed it with the Mod Podge.

"Nothing beats making a stranger smile with random acts of kindness."
 For more from Christie, check out her website, Crafty Christie’s Creations, she specializes in handmade greeting cards, and DIY paper crafts. She is an EXPERT in Silhouette Studio, which has also led her to start producing tutorials to make all this crafting a bit easier. Follow her on Instagram @craftychristiescreations for more fun craft projects and tips!
SIGN UP BELOW TO GRAB THE FREE ST. PATRICKS CLOVER ROCK SVG
To grab these free designs from some of my other favorite bloggers, click the links below:


- Shamrock Cutout Card - The Bearded Housewife
- Let the Shenanigans Begin Drink Cozy - Spot of Tea Designs
- St. Patrick's Day Unicorn - Maggie Rose Design Co
- Rainbow Stencil - Oh Yay Studio
- Handlettered "Lucky" - Polka Dotted Blue Jay
-
Lucky Charm Stickers - Simply Made Fun
- Pot of Gold - Lucky - Poofy Cheeks
- St. Patricks Clover Rock - Pen & Posh
-
March Planner Stickers - Crafting Overload
- St. Patrick's Day Cupcake Toppers - The Craft Print
- Textured Rainbow - Liz on Call
- Lucky Boho Rainbow - Gina C. Creates
- Cheetah Print Shamrock - The Walnut Street House
- Good Luck Four Leaf Clover - Persia Lou
- Home Sweet Home - Studio Xtine
- Lucky Charm with Rainbow - Sunshine and Munchkins

1 comment
Who doesn’t love a cute rock project?!?! :) So adoarble!